Free Shipping on Orders Over $100

Elderberry
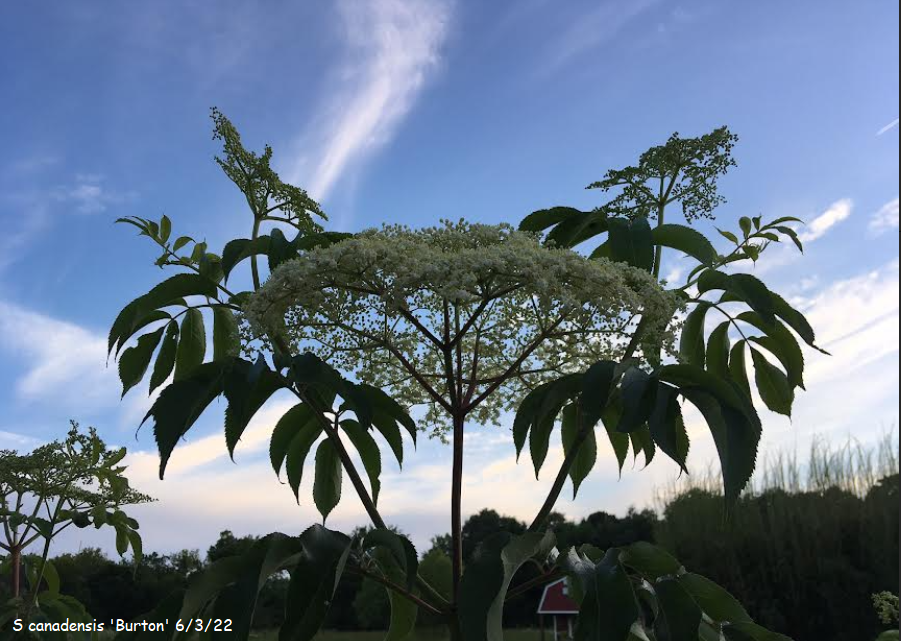
American Elderberry, Sambucus canadensis ‘Burton’ in her third year, full bloom. This particular variety has an interesting story. Normally I wouldn’t even consider taking cuttings from a wild growing plant without first having seen the ripe berries. My friend who sent photos of the mother plant in flower, William Walker, said it made the biggest bunches of berries he had ever seen around here. Still, I would normally need to see for myself. I like big berries that hang pendulous when ripe, evenly ripe.
These are a few desirable traits one should look for when selecting wild plants for propagation. Every Elderberry plant from seed is a distinctly unique variety due to genetic diversity in the seeds. Even two seeds within the same berry will not be exactly true to the mother plant. The way to exactly duplicate the genetics of the mother plant is to propagate by root and/or stem cuttings or plant tissue culture in a lab.
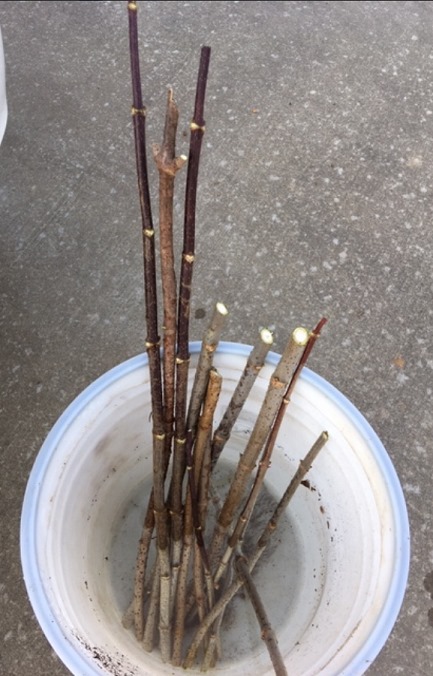
It was late December, 2019 when I drove up to the mother plant, having asked the property owner for permission to get cuttings. I actually thought to myself that this was crazy. I already had a couple of other selected varieties to work with, why was I bothering? Something just compelled me to and so a few were snipped and placed into a bucket with water. We don’t want Elderberry cuttings to dry out, ever! Good thing too, the mother plant was sprayed by the power company the following spring. Didn’t completely kill her but she’s nothing today like she was. Burton went on to shock me with a perfect, large bunch of pendulous berries, in only her second year in our back yard. I look forward to this and coming years with her constantly impressing me with her vigor, large flower umbels and of course, those beautiful Elderberries!
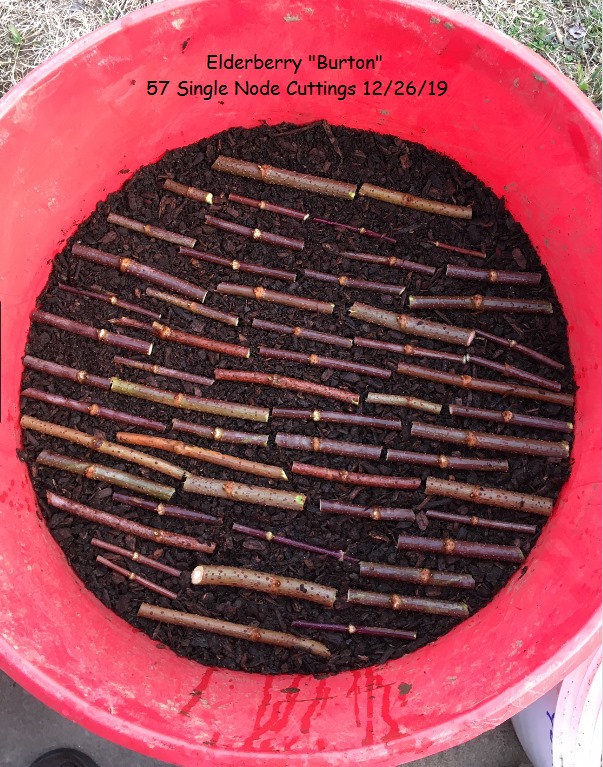
Single node experimental cuttings were already done exactly like this with another wild variety named ‘Carolyn’ so I decided to try it with Burton as well. Fifty-seven single node cuttings were laid horizontally in the tub of old leaf and wood chip compost and covered with about .5 inch of more compost on 12/26/19 and kept wet. I watered the tub every day it didn’t rain or snow covered the surface.
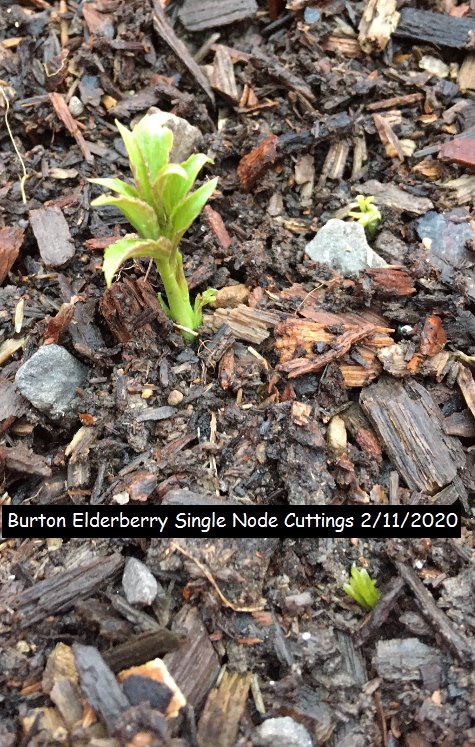
On 2/11/20 we have sprouts emerging from the buried buds. Arkansas winters are generally mild but Elder is a very hardy plant, often sending out shoots when there’s still ice on the ground in many parts of the country. Several days and nights these cuttings had to be frozen. It is best to root Elder cuttings in the colder weather like this. It keeps top growth to a minimum while roots form. Too much top growth on warm weather cuttings without root growth = cutting death.
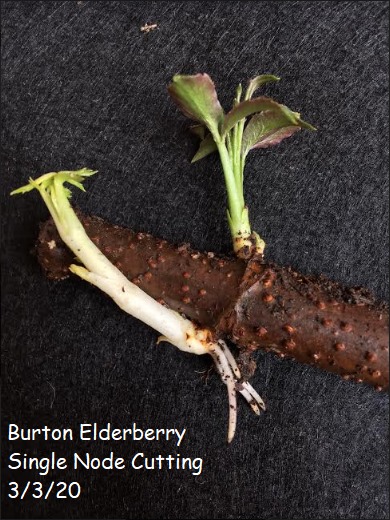
I used a plastic fork a few times over the weeks since sprouts first emerged to inspect for roots. Here we have roots on 3/3/20. This taught me that cuttings need to be buried deeper so roots can form on the new stem growth under the surface and they need to be placed with both buds sideways instead of one up and one down. All experiments after this were done so. Only one of the Burton cuttings didn’t survive the winter, the very smallest diameter one. Larger diameter cuttings perform better than pencil size and smaller.
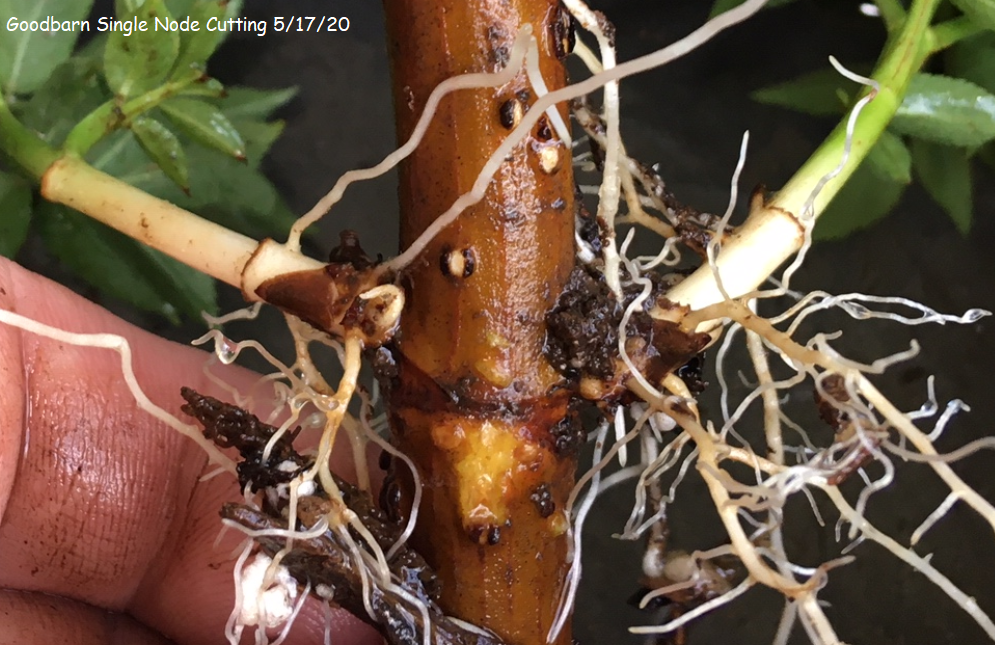
A different variety, ‘Goodbarn’, showing what can happen when the cuttings are buried deeper. Both buds sprout and root on the new stem growth under the surface, faster than roots form on the cutting wood. This is fairly consistent among all varieties experimented with. It’s best to start these cuttings in their own pots versus all in one container to save from having to dig them up to transplant. You know they’re rooted when significant top growth begins. Keep them wet. Dried out cuttings = dead cuttings.
Elderberry can be found in nature in the low places that tend to stay damp. Along rivers, creeks and any body of fresh water, ditches, railroad right-of-ways, under power lines and along fence rows where birds land and deposit seeds. It’s advised to not harvest flowers or berries from any place that might be sprayed with herbicides, pesticides or growth regulators but okay to take cuttings if you find a plant worthy of propagation.
Don’t just go take cuttings from the first Elder you find. I consider those worthy of propagation as having desirable traits like bigger berries than the rest of the natives on large umbels that hang upside down when ripe, making it harder for birds to get them all before you do. Even ripening is very beneficial so you can harvest the whole umbel at once with minimal or no unripe berries. I observed many plants the whole year of 2019 to make two selections and went blind with Burton. It was just meant to be.
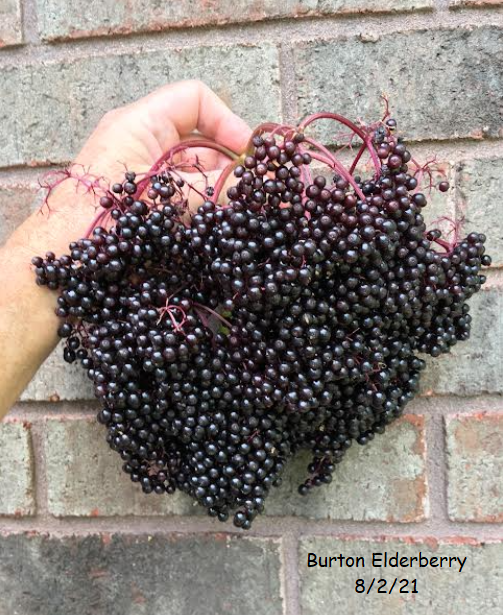
For best tasting results in Elderberry recipes, only select fully ripe berries, no red or green. Most wild varieties tend to ripen from the outer edges of the bunch, inward toward the center. Even when they turn dark purple such as these, let them have another week or so to sweeten up. This bunch was so heavy it snapped the stem and had to be harvested a bit earlier than I like but they are usable.
So you’ve found some and the best ones are up and out of reach? The best tool I’ve ever found for harvesting Elderflowers and Elderberries is the Corona Long Reach Cut & Hold Pruner. It helps reach those too high up and also protects you from stinging or startling insects. It doesn’t work too well on any hardwood but cuts through the soft Elder stems under the berries like butter and holds onto them as you lower into your pail.
Small-scale home growers’ biggest challenge when harvesting Elderberries is cleaning the ripe berries from the stems without getting a bunch of stems and unripe berries in with the ripe ones. If you’re interested in the absolute most efficient way to harvest and separate ripe berries from stems, go to Elderberry World and watch the harvesting video in the pinned featured posts section by group member Christina Oliveri. Click here!
For studies on the therapeutic and dietary attributes of Elderberry, Google “Sambucus Pubmed“.
Tags:
© 2021-2023 Charlie Little's Elderberry Way. All rights reserved.